
AI to Real Image Converter: How to Make an AI Image Look Like a Real Photo
AI to Real Image Converter: How to Make an AI Image Look Like a Real Photo
Last updated: October 11, 2026 · By the sparkpix.ai Editorial Team
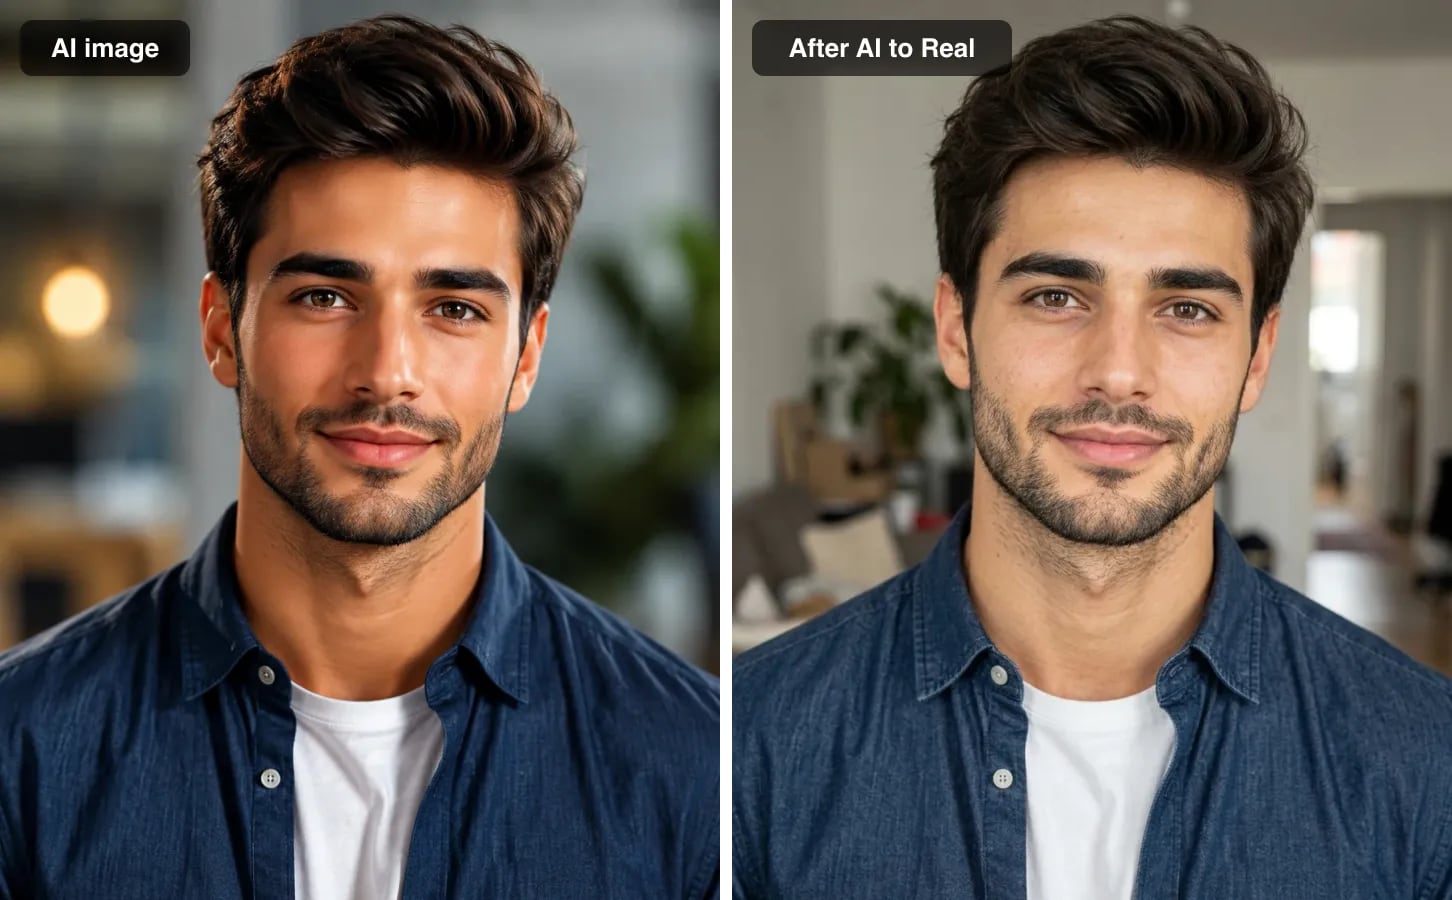
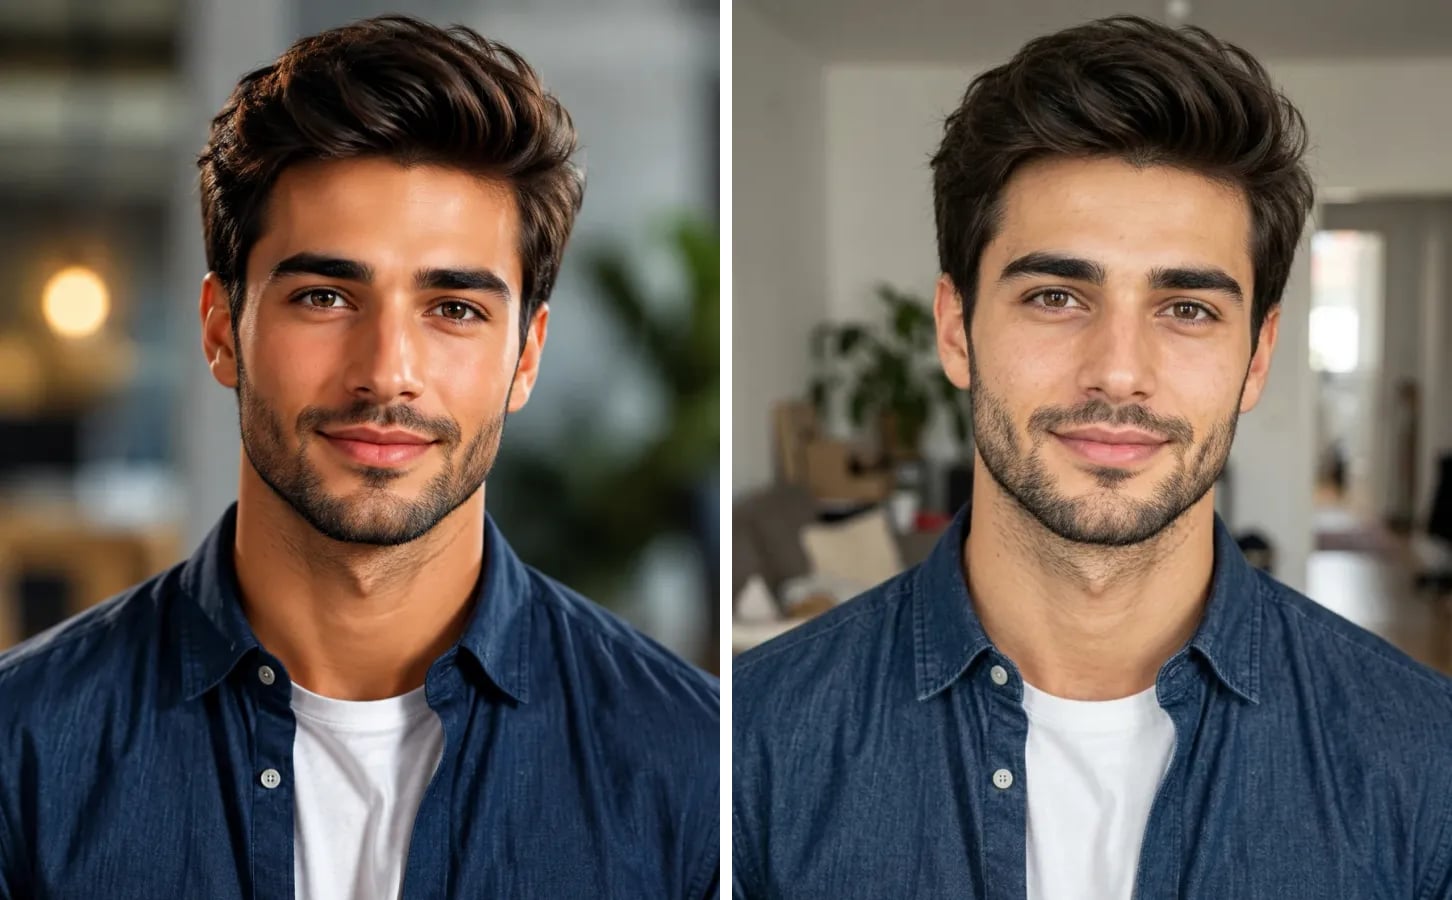
Left: an AI-generated portrait. Right: the same image after one pass of an AI to real image converter. Same man, same shirt, same framing; only the rendering changed.
Quick answer: the fastest way to make an AI image look like a real photo is to run it through an AI to real image converter, which re-renders the image the way a phone camera would have captured it while keeping the subject, pose and framing. On sparkpix that is one upload and one click, and the median conversion took 28 seconds in the 24 hours to October 10, 2026. If one specific flaw survives, name it in a prompt; if the composition itself is wrong, fix the generation prompt instead; if a single hero image needs pixel-level control, retouch it by hand. The four methods are compared in a table at the end.
Why AI images look fake
Generators have been good at composition for a while. What still gives an image away is how it is rendered, and the tells are always the same:
- Skin with no pores. A generated face is one airbrushed surface. Real skin has pores, fine lines, peach fuzz and uneven tone.
- Light from nowhere. The face glows evenly, the edges carry a rim light, and no lamp in the scene could have produced either.
- An advertising colour grade. Saturated, contrasty and noiseless, often orange-and-teal. A phone records colour slightly muted and slightly imperfect.
- Backgrounds that melt. Look past the subject and shelves have no objects, signs have no words and streets have no detail.
- No trace of a camera. Real photos carry sensor grain, focus falloff and a little compression. Renders are suspiciously clean.
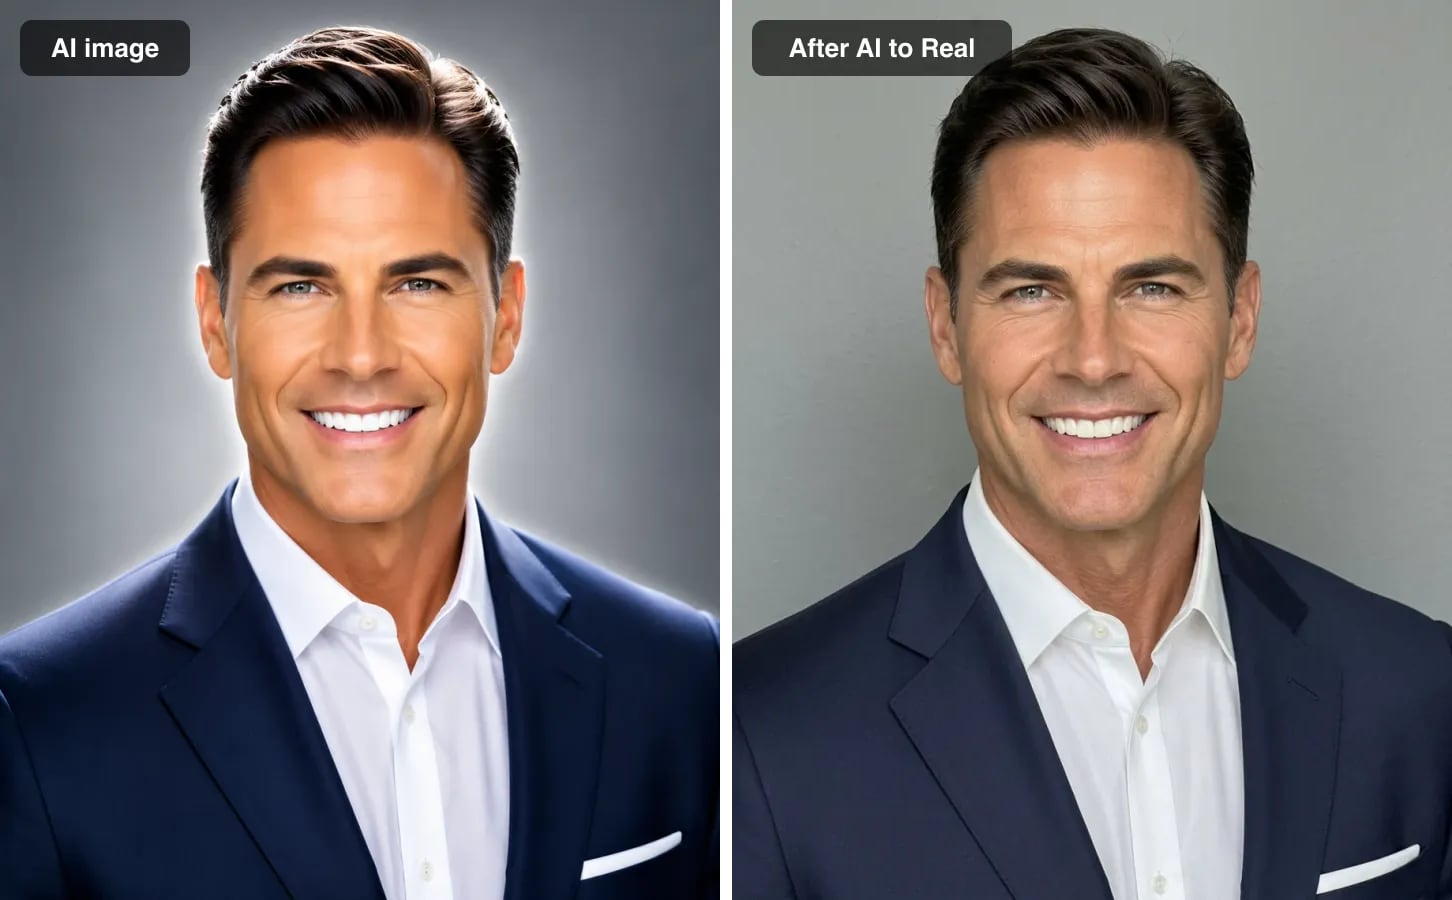
A typical AI headshot: a glowing halo, skin like tanned wax and teeth a shade too white. Converted, the halo becomes a plain grey wall and the face gets pores and fine lines.
Nobody checks these one by one; the eye reads them all at once and decides in half a second. That is also why fixing a single tell rarely works. Add grain to a waxy face and you get a waxy face with grain.
Method 1: Use an AI to real image converter (fastest)
An AI to real image converter re-renders the whole image instead of patching tells one at a time. The sparkpix AI to Real Image Converter runs the Nano Banana 2.1 image model with an instruction that names each tell (oily skin shine, glow and bloom, orange-teal grading, painted hair, empty backgrounds) and fences off identity: the same person, face, expression, pose, clothing and composition.
How to do it:
- Export the AI image at its largest size.
- Open the AI to Real Image Converter and sign in.
- Upload the image and click Convert to Real Image. There is nothing to type.
- Download the result and compare it with the original side by side.
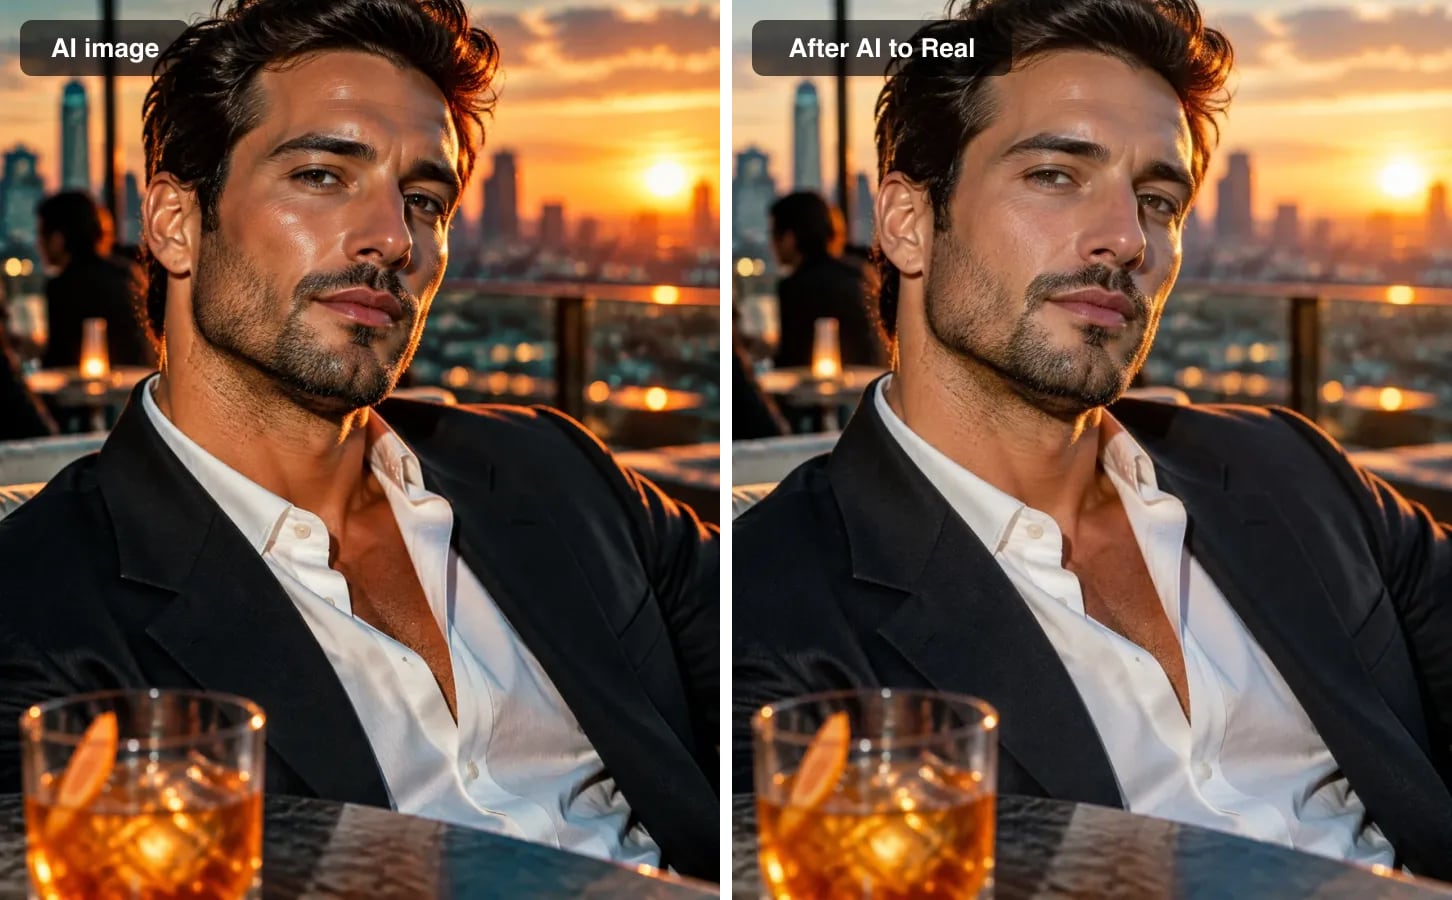
Oily, varnished skin is one of the loudest tells. After conversion: matte skin, pores and stubble, under the same rooftop sunset.
What we measured across every conversion on sparkpix's realism tools in the 24 hours to October 10, 2026:
| Measure | Result |
|---|---|
| Median time to result | 28 seconds |
| 90% of results back within | 47 seconds |
| Runs that failed (refunded automatically) | 1.9% |
| Output resolution | 1K free first image, 2K on paid credits |
Most failures are the model's safety filter refusing an image. It is the same job on products and food as on faces:
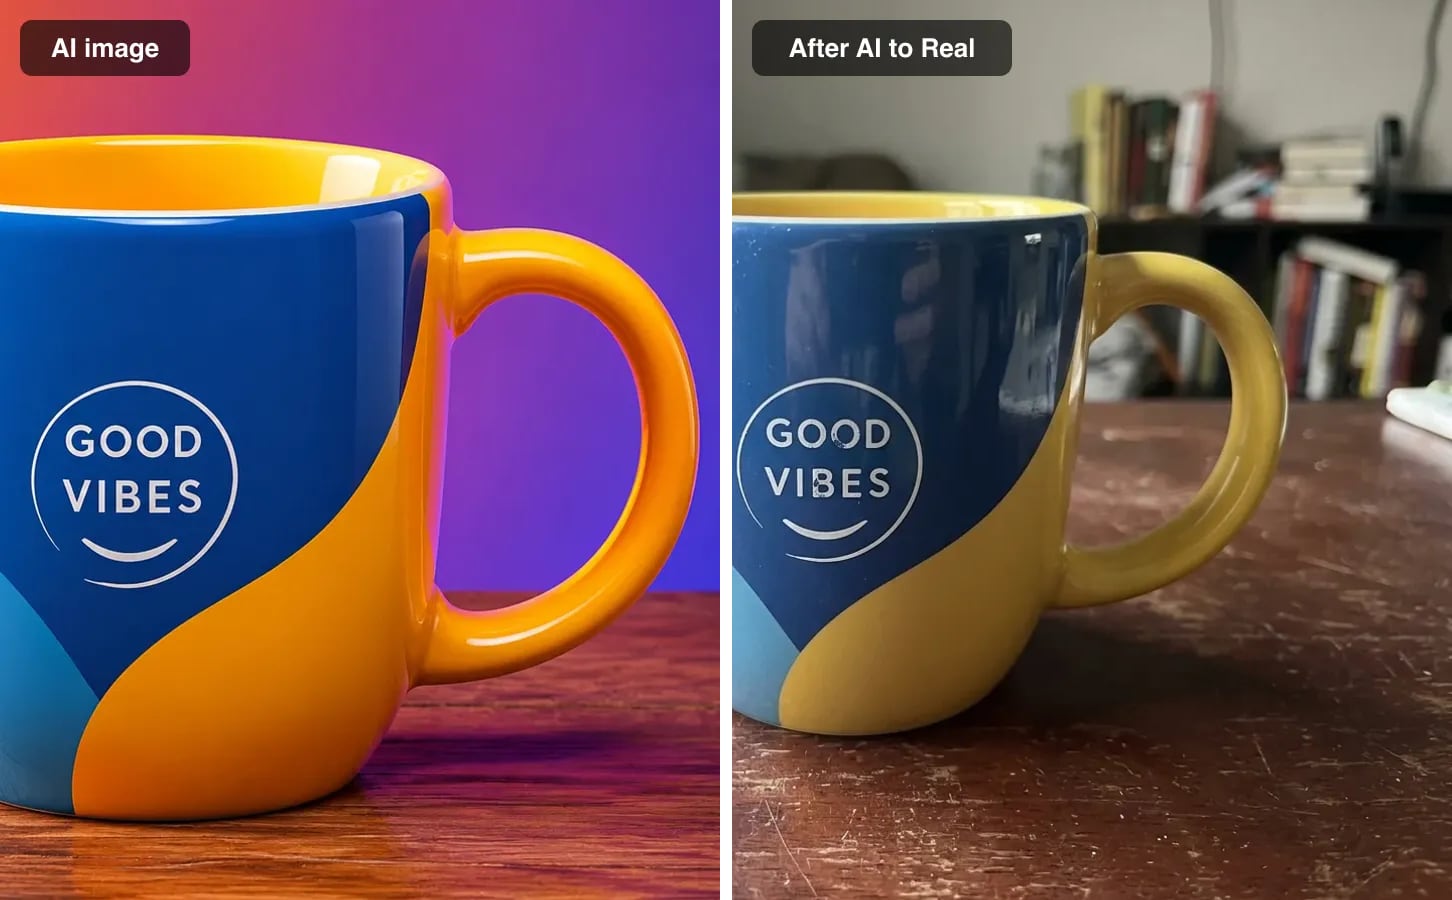
Product render to product photo: the mug and its design are untouched; the neon gradient becomes a worn wooden table with a bookshelf behind it.
Best for: an image you already like, where the only problem is that it reads as rendered.
Method 2: Tell a humanizer exactly what to fix
Sometimes one tell survives a converter pass: a bit of shine on the forehead, a warm cast that should be neutral. A prompt-based tool lets you name it. The AI image humanizer runs the same engine as the converter but adds a prompt box, so you can write things like:
- "Keep everything the same, but remove the shine on the forehead and nose and show visible pores."
- "Neutral white balance. Remove the orange cast from the walls and the skin."
- "Light this like overcast daylight from the window on the left."
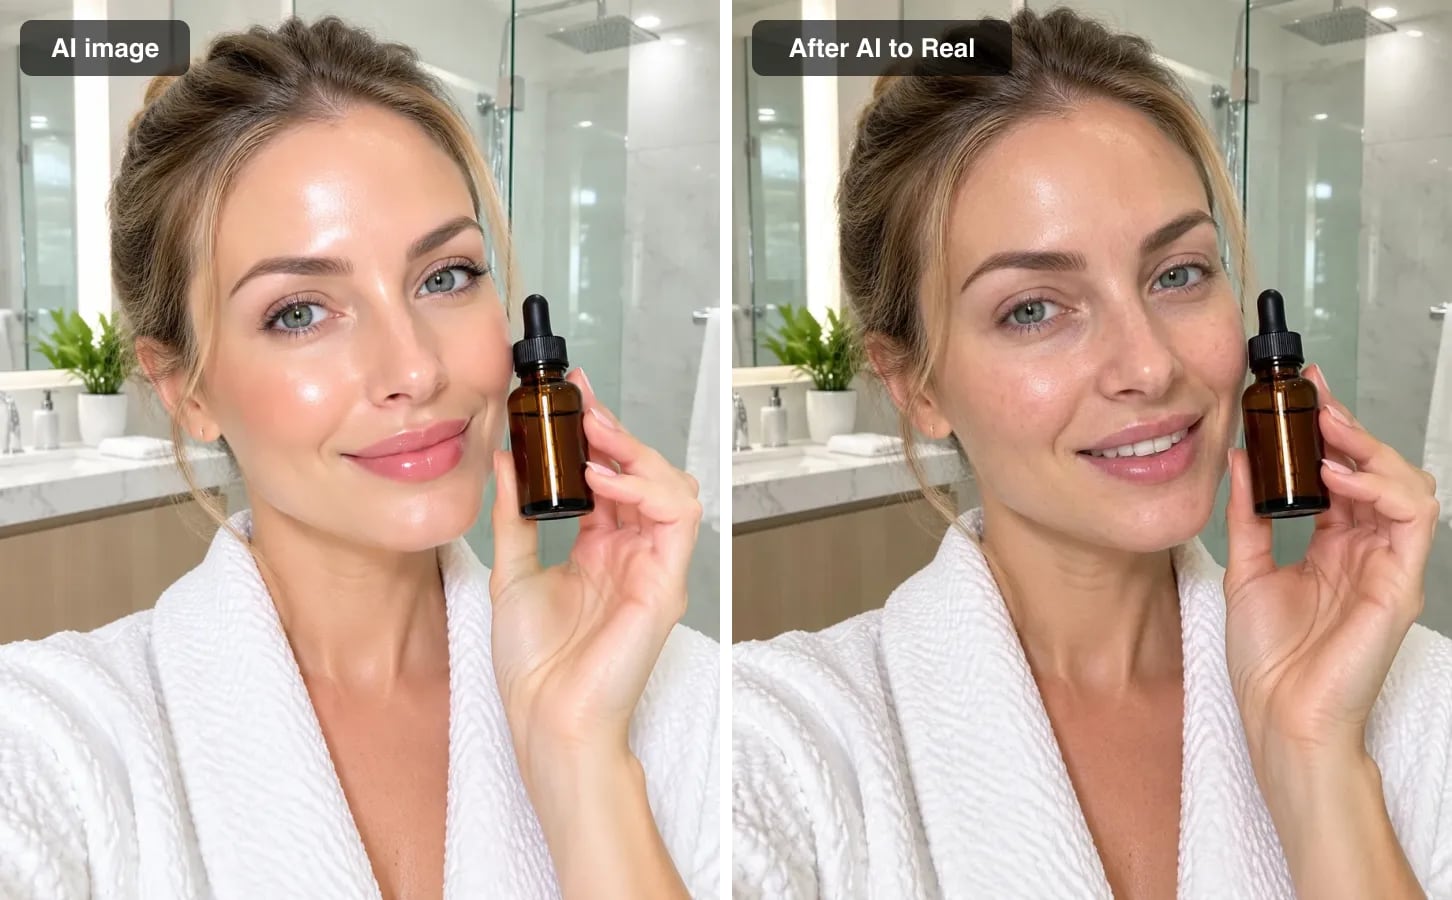
A UGC-style skincare ad: the wet glass-skin shine and lacquered lips go, freckles and pores come back, and the bottle and bathroom stay where they were.
Best for: a converted image that is almost right, with one specific flaw you can put into words.
Method 3: Fix the prompt before you generate
If the image has not been generated yet, or the composition is wrong anyway, you can avoid much of the AI look at the source. Prompts that ask for "quality" are what produce the rendered look, so describe a situation and a camera instead:
- Drop quality words. "8k", "ultra-detailed", "flawless skin", "cinematic lighting" and "octane render" all push toward the glossy look.
- Name an ordinary camera and moment. "Taken on a phone at a friend's kitchen table" gets you closer than "professional photo".
- Name an ordinary light. "Overcast daylight", "a single window", "a ceiling light at night".
- Ask for imperfection. "Visible pores, flyaway hairs, a little clutter in the background."
For example, "portrait of a woman, flawless skin, cinematic lighting, 8k, ultra-detailed" becomes "photo of a woman in her 30s at a kitchen table, taken on a phone, window light from the left, visible skin texture, a few dishes in the background".
The catch: every regeneration is a new image. Once you have one you like, re-rolling risks exactly what you want to keep, and that is the point to switch to Method 1.
Best for: images you have not made yet, or ones whose pose and scene need to change anyway.
Method 4: Retouch it by hand
Photoshop or Lightroom gives full control at the cost of time. A typical pass:
- Neutralise the white balance so whites read white and skin is not orange.
- Pull back saturation and clarity a little; AI colour is almost always pushed too far.
- Rebuild skin texture with a texture overlay or frequency separation, so pores show without adding blemishes that were never there.
- Add light, even noise across the whole frame so it matches a camera sensor rather than a render.
- Fix the background by cloning in real detail where objects have melted.
- Add mild lens falloff: a soft vignette and slightly less sharpness toward the edges.
Expect roughly 30 to 60 minutes per image for someone fluent in Photoshop.
Best for: one hero image that justifies the time, where you need pixel-level control.
Which method should you use?
| Method | Time per image | Keeps your image | Skill needed | Use it when |
|---|---|---|---|---|
| AI to real image converter | About 30 seconds | Yes | None | The image is right; only the rendering looks fake |
| Humanizer with a prompt | About 30 seconds | Yes | Describe the flaw | One specific tell survives |
| Better generation prompt | Minutes to hours | No, every roll is new | Prompt-writing | The composition needs to change anyway |
| Manual retouching | 30-60 minutes | Yes | Photoshop | One hero image needs full control |
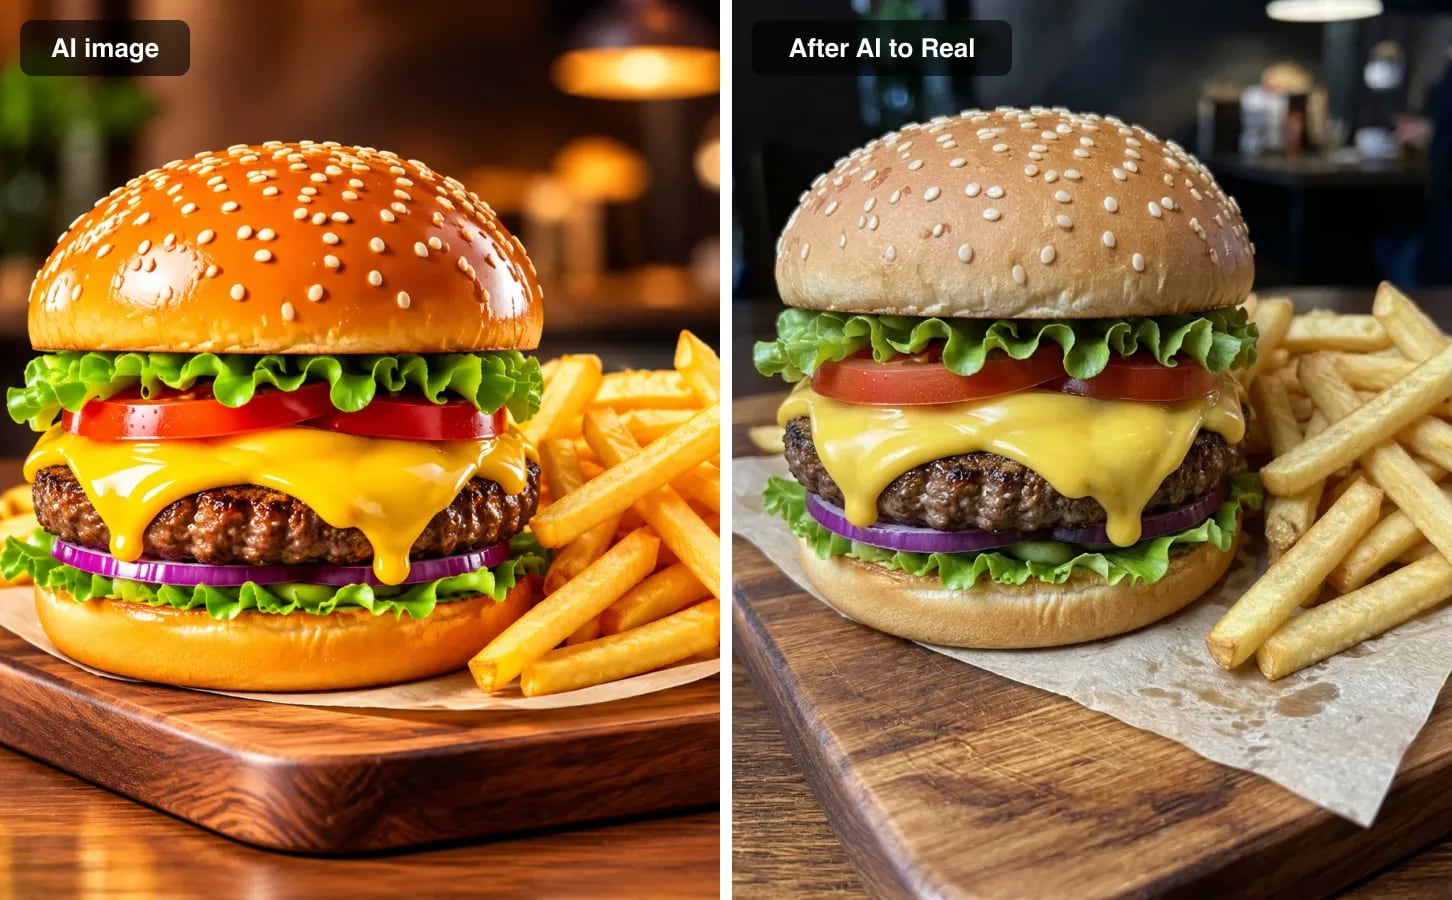
Food render to menu photo: the varnished bun becomes a matte, floury one, with ordinary fries and plain restaurant light.
What none of these methods will do
- Get past AI detectors. Detectors read metadata and statistical patterns that visual realism does not touch. If a platform requires AI content to be labelled, label it.
- Turn a drawing into a photo, on sparkpix. The converter keeps an anime or painted image in its own style and only removes the rendered sheen.
- Fix a bad composition. Conversion and retouching both keep the pose and scene. If those are wrong, go back to Method 3.
Price
On sparkpix, signing up gives you 5 free credits and one conversion costs 5 credits, so your first conversion is free. After that, credit packs start at $9.99 for 350 credits, about 70 conversions, with no subscription. Paid conversions come out at 2K; the free one is 1K. If the image is headed for print, convert first at native size and then enlarge it with an AI photo upscaler.
Comparing tools rather than methods? See the best AI to real image converters for AI photos, anime and 3D renders, or the best AI image humanizers, compared by price and face safety.
Sources: sparkpix production data for the 24 hours to October 10, 2026; all before-and-after images are unretouched outputs of the converter's engine at 1K.
How to make an AI image look like a real photo
- 1
Export the largest original
Download the AI image at its full resolution. The converter rebuilds texture from what is there, so a small or recompressed copy gives it less to work with.
- 2
Upload it to an AI to real image converter
Open the sparkpix AI to Real Image Converter, sign in and upload the image. It works on images from Midjourney, ChatGPT, Gemini, Stable Diffusion, Flux or any other generator.
- 3
Convert
Click Convert to Real Image. There is nothing to type; the image comes back in about 30 seconds with the same subject, pose and framing.
- 4
Compare and fix what is left
Compare the result with the original side by side. If one flaw survives, such as shine on the forehead or an orange cast, name it in the AI image humanizer prompt box and run it once more.
- 5
Upscale last if it is going to print
Convert at native size first, then enlarge with an upscaler. Upscaling first only makes the AI texture bigger before it is fixed.
Frequently Asked Questions
How do I make an AI image look like a real photo?
The fastest way is an AI to real image converter: upload the image and it is re-rendered the way a phone camera would have captured it, with the subject, pose and framing kept. On sparkpix the median conversion took 28 seconds in the 24 hours to October 10, 2026. If one specific flaw survives, name it in a humanizer prompt; if the composition is wrong, regenerate with a better prompt; for one hero image that needs pixel-level control, retouch it by hand.
Is there a free AI to real image converter?
sparkpix gives 5 credits on sign-up and one conversion costs 5 credits, so the first conversion is free at 1K resolution. After that, credit packs start at $9.99 for 350 credits, about 70 conversions, with no subscription; paid conversions come out at 2K.
Can an AI to real converter turn anime into a real person?
Not this one. The sparkpix converter keeps illustrations illustrated: it removes the rendered sheen from an anime or painted image but does not turn a drawing into a photograph. Tools built for anime-to-real conversion redraw the character as a person, so expect a new face rather than a converted one.
Will converting an AI image change the face?
The sparkpix instruction explicitly keeps the same person, face, expression, pose, clothing and composition, and only changes how the image reads as a capture. Any generative re-render can still shift very fine details, so compare the result with the original side by side and convert once rather than repeatedly.
Will a converted image pass AI detectors?
That is not what conversion is for. AI detectors read metadata, provenance signals and statistical patterns that visual realism does not touch, and no tool can honestly promise to beat them. If a platform requires AI content to be labelled, label it.
Ready to Transform Your Images?
Start creating amazing AI-powered images today with sparkpix.ai
Try It Free